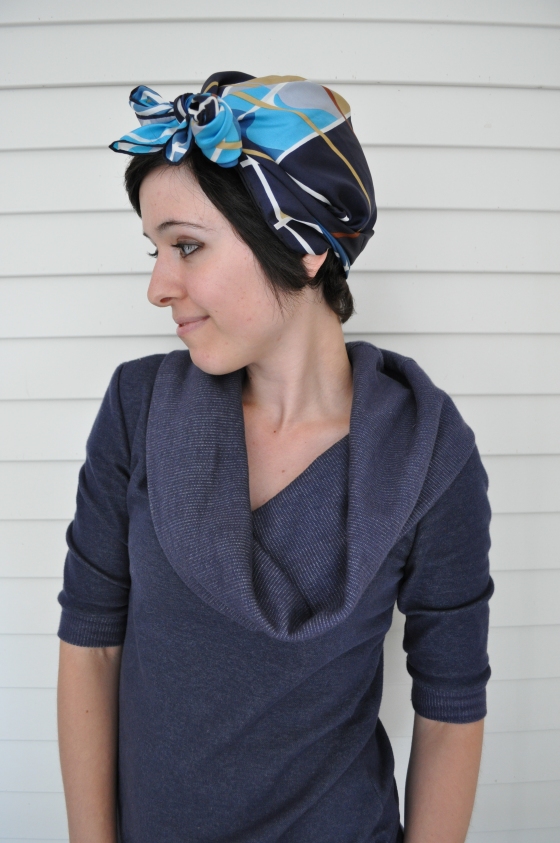
Scarf Tutorial 5 – Head Wrap Bow

Happy Friday! We have a cute scarf style to show you today, but I’m afraid our images for our tutorial just didn’t turn out how we wanted them to, (we swear we’re not just slacking off because it’s Friday!) so you’re going to have to settle for our explanation instead. Good thing it’s a simple one!

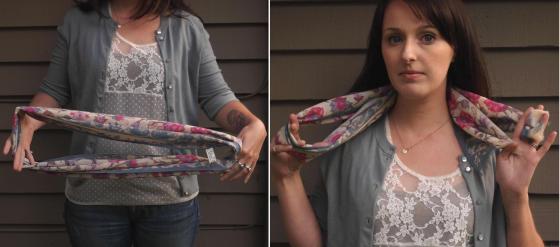
So, this is one more of our favorite styles, the head wrap with a bow:

Scarf Tutorial 1

It really is quite an effortless look to achieve. Simply fold a large square scarf into a triangle, and, placing the middle of the folded edge against your neck, wrap around your head, tying at your forehead. Tuck in the edges so it looks nice, then tie the ends into a bow, and position it at your forehead, or by your ear.

Scarf Tutorial 2

Waa laa! Easy and adorable!

We are absolutely in love with the scarf we used for this style – we encourage you to hop on over to Etsy so you can see the whole thing laid out flat. It’s amazing.

That concludes our scarf week! We hoped you enjoyed the pieces we chose, and the tutorials we gave you! We’ll have some more scarves for you next week, so keep an eye on our shop, or like us on Facebook to get the first word when we put up something new.

Scarf Tutorial 4 – Headwrap Braid

Good morning! Our tutorial today is a sweet, flirty style that we came up with while playing around with one of our extra long, skinny scarves. We also like the way this one looks when you roll the braid up into a side-bun – play around with it, and see what you like best! If you give it a try, we’d love it if you’d share it with us.
Scarf Tutorial - Headwrap Braid 1

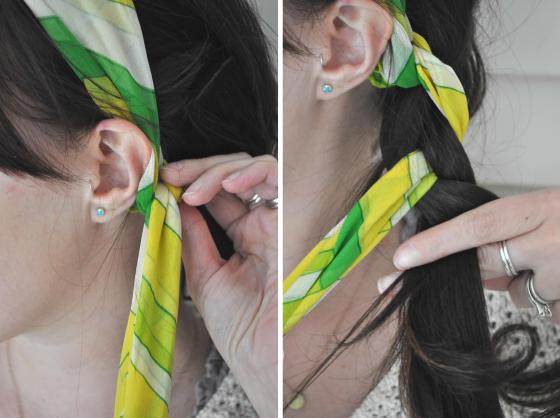
Start with a long rectangle scarf (or a large square scarf, folded into a skinny rectangle). Gather hair to one side. Wrap scarf over your head, and make a knot behind one ear, leaving one end as long as possible.

Scarf Tutorial - Headwrap Braid 2

Tuck the short end of the knot so that it won’t be visible. Separate hair into two sections, then braid the hair and scarf together.

Scarf Tutorial - Headwrap Braid 3

When you get to the end, wrap the excess scarf around the end. You may either tuck it in and be finished (you can sneak a bobby pin in there too!), or continue to the next step:

Scarf Tutorial - Headwrap Braid 4

You may secure tightly with a hairband, and then wrap the end of the scarf over the hairband to cover it.

Scarf Tutorial - Headwrap Braid 5

…and, hello gorgeous!

We used our “Suzie” scarf for this how-to – a rayon chiffon scarf from the 1960’s. If you want it for your very own, you can see it in our store.

Scarf tutorial 3 – Fleur de Lis

Hello again! We’re back for our third tutorial, and this time we’re showing you how to do something fun with a much smaller scarf. There are plenty of very small scarves out there that are beautiful, but aren’t as versatile to wear as a larger scarf that can be tied into dozens of styles. The one we’re using for our how-to today is a big favorite of ours (how cute is this heart print?!), and we’re happy to inspire you with one way to show it off.

This Fleur de Lis fold is actually a napkin folding technique, but we think it makes a cute and playfold fold for a pocket square! Tuck it in your jacket pocket for a traditional look, or let it hang out of the back pocket of your jeans for an unexpected pop of personality.

Scarf Tutorial - Fleur de Lis 1

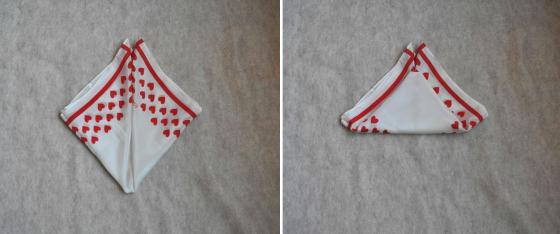
Start with a small square scarf. Fold in half into a triangle. Then pick up the bottom left corner and fold up to the top…

Scarf Tutorial - Fleur de Lis 2

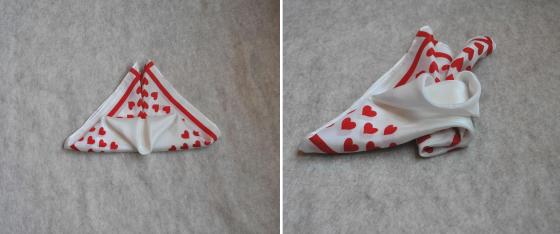
…and the bottom right corner up to the top as well. Now take the bottom corner and fold it 2/3 of the way up to the top…

Scarf Tutorial - Fleur de Lis 3

…and then fold the top of it back down. Grab the right side and tuck it under the whole scarf, rolling it in half to fit neatly in the middle of the back.

Scarf Tutorial - Fleur de Lis 4

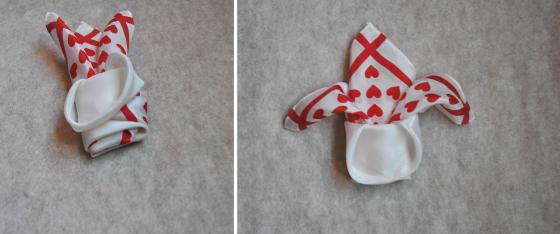
Then fold the left side all the way around (making a little burrito!), and tuck the corner under the fold in the middle front to secure it. Fluff out the points at the top, et voila! A perfect Fleur de Lis for tucking wherever you like!

Scarf Tutorial - Fleur de Lis 5

Sure, you could just cram the whole scarf in your pocket, and foof out the ends to get a similar effect, but with the Fleur de Lis fold it will stay neat and tidy all day!

If you love this little Valentine scarf please check it out in our shop – we just added it today!

Scarf Tutorial 2 – Rosette Turban

We’re back today with another scarf tutorial!

This has been a popular year for turbans and head-wraps among the trendy. We have seen a lot of wonderful how-to’s out there for basic, easy, turban-inspired styles. Rather than give you a repeat, today we’d like to show you a more complicated trick – a full turban with a rosette on the side! This look takes a little practice to perfect, but the effort is worth it.

Use a long rectangle scarf for this, or a large square folded over into a triangle.

Rosette Turban Tutorial 1

Put the middle of the folded edge of the triangle (or the middle of the rectangle) at your forehead, with the point at your back.

Rosette Turban Tutorial 2

Leaving the middle corner loose, take the other two corners and tie them on one side of your head.

Rosette Turban Tutorial 3

Tuck and fold the back in neatly!

Rosette Turban Tutorial 4

Now double that tie on the side to make a knot. Take the smaller end of the tie and twist it.

Rosette Turban Tutorial 5

Wrap the twist around the other end of the tie, and around the knot in a spiral, tucking the end into the knot.

Rosette Turban Tutorial 6

Repeat with the other tie, tucking in well.

Rosette Turban Tutorial 7

Adjust, and enjoy your gorgeous little turban!

For this technique we liked the softer colors of our ‘Alice’ scarf – a silk/rayon blend from the 1950’s, patterned with puffs of thistle colored flowers.

Scarf Week, and our first tutorial!

At Lise + Katina we have deemed this week to be… Scarf Week! We will be adding a different vintage scarf to our shop every day this week, and we have some blogging to do that we are really excited to show you!

Our first thought was to fill our blog with pictures of sharks with scarves ‘shopped onto them (Because, you know… Shark Week? Scarf Week? Well at least we crack ourselves up…), but honestly neither of us is that good with photo editing, so you’ll have to settle for our second choice – scarf-tying tutorials! We picked some of our favorite ways to wear our own vintage scarves, and we will be posting how-to’s along with the listing of the day.

Let’s start it off with something simple – a casual look that is easy to do, but appears polished. This trick works best with a long rectangle scarf (ideal for winter scarves too!), but you can also do it with a large square scarf – just fold it over into a triangle, and then fold it over on itself two more times to make it long and skinny.

Casual Scarf Tutorial 1

 Fold scarf in half, and put it around your neck with a loop on one side, and two ends on the other.

Casual Scarf Tutorial 2

2. Put one of the ends through the loop, going over the edge of the loop that is closest to you, and under the edge farthest away. With the other end, this time go under the edge closest to you, and over the edge farthest away.

Casual Scarf Tutorial 3

Pull both ends to tighten.

Casual Scarf Tutorial 4

Ta da! Effortless and adorable!

The scarf we chose for this look is our vintage ‘Fleur’ scarf by Vera – a rare, light, summer wool in earth tones with a pop of hot pink. We just put it in our shop this morning, so go have a look!

Loves for Less: Fall Coats

Today we are introducing a new regular segment on our blog called Loves for Less.  Loves for Less will highlight the biggest deals we are offering by showing you how our vintage piece holds up to today’s comparable styles! We hope that we can show you what a smart investment buying beautiful, classic, vintage styles can be for your wardrobe!

So, let’s start out with something that has us head over heels – a sleek coat for fall and winter in a luxurious fabric.

The key to making a wardrobe investment is to choose a high-quality piece with a classic style. Anything too trendy will look dated within only a couple of years, and buying a well-made garment ensures that with proper care it will continue to look as good as it did when you bought it. If we were going to suggest something that meets both of these criteria, these styles from Fleurette at Nordstrom would certainly be it!

Coat Comparison 2

Coat Comparison 1

1 | 2 | 3 | 4 | 5| 6

All of them gorgeous, right? And if they were in our price range we would be happy to own any one of them! All of them are priced at over $1,000 (but two of them are on sale for around $500!!).

As you may have noticed, earlier today we listed our Winona Coat – a belted trench made of 100% camel hair with a lovely sleek shape (and the silkiest lining in the world!). Our coat is also by Fleurette of California from Nordstrom, and we bet there’s no way you could tell that it was made roughly 20 years earlier than the beauties above! Truly – no wear at all, and very few style differences. We have ours priced at $175… so if you’re looking for the perfect fall coat, ours just might be the one for you.

Coat Comparison 3

Not your size or color? We recommend searching Etsy for ‘Fleurette coat‘, or ‘cashmere trench‘ and seeing what you come up with!

Tell us – what would you like to see on Loves for Less?

New season, new listings!

Japanese Garden September

Well, it’s officially autumn! Here in the Seattle area it went from sunny and 75° one day to cloudy and windy the next, just like that. We might be wishing we had gotten a little more time at the beach this year, but we’re also both ridiculously excited for our favorite holiday – Halloween!

We’re excited to get you all ready for fall too, so we’re putting out some new items in our shop to help you brave frosty mornings and breezy afternoons. No sneak-peek pictures this time, we’re giving you hints instead!

Monday: This piece has a little bit of everything we love for fall, but the best part is the row of carved plastic buttons in a marbled cream. 9/19 – It’s a 1950’s tweed coat!

Tuesday: A rare find; ideal for fireside snuggles. 9/20 – A mid-century German knit sweater!

Wednesday: Our mid-week listing features two luxurious components – the softest faux leather we have ever felt, and gorgeous marbled tortoiseshell Lucite! 9/21 – An easy to wear 1960’s handbag!

Thursday: Neon accessories are everywhere for fall and next spring! Our cheery bright item will fit in nicely with your earthy autumn tones as well. 9/22 – Extra large hot orange clip-ons!

Friday: A classic piece that every girl should have in their closet, at an absolute steal of a price. 9/23 – An incredible Camel Hair Trench!

Think you can guess what we’ve got for you? You’ll just have to keep an eye on our shop this week to find out for sure! And of course, if you like us on Facebook you’ll be able to see our alerts when we post our new pieces.

(P.S. we took our picture at the Japanese Garden at the Seattle Arboretum. You can feed some monstrous koi there!)

Happy fall!

Eye Candy

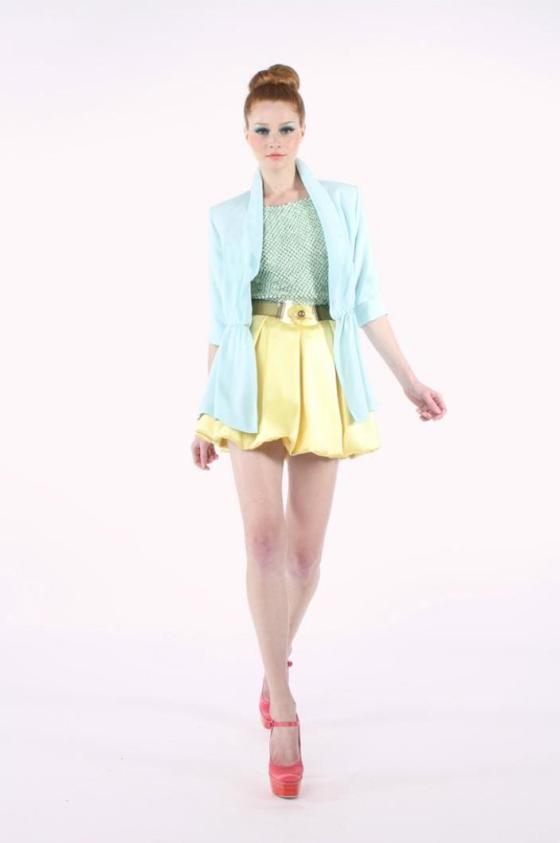
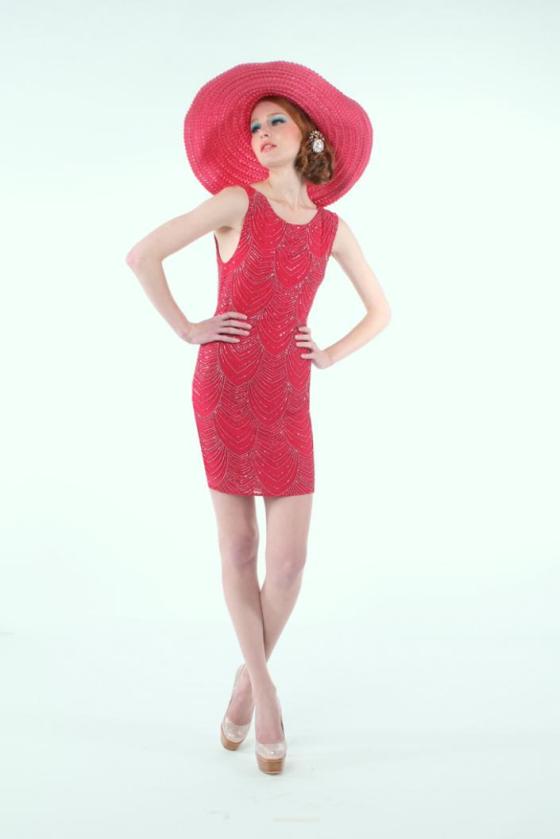
Can we just drool for a moment over Alice + Olivia’s Spring 2012 presentation that debuted yesterday?

The brand is always applying vintage looking touches to their modern looks, but this season just hits it out of the park for us. Candy colored retro styles blend most of our favorite era’s for fashion – 20’s, 50’s, 60’s and 70’s – all into one collection. The shoes, the hats, the sunglasses! Neither Lise nor Katina are girly girls, but these pastels and florals are looking pretty tempting for this spring.

AliceOlivia SS12 RTW 1

Alice Olivia SS12 RTW 4

Alice Olivia SS12 RTW 6

Alice Olivia SS12 RTW 2

Alice Olivia SS12 RTW 3

Alice Olivia SS12 RTW 5

Images from Style.com

If you’re as inspired by these looks as we are and want a head-start on a couple of pieces to wear come spring, try searching Etsy for things like “1960s enamel brooch“, “bright geometric scarf” or “1970s floral pants“. And remember to keep an eye on our store too for similar pieces coming closer to spring (and of course relevant pieces for this season as well!)

– Lise + Katina

Loves: calivintage

I just stumbled upon calivintage, and I could not be more in awe. This girl truly knows how to style her incredible vintage finds without looking like she’s wearing a costume. Her perfect attention to detail in all of her looks has me scrolling back through pages of posts, pretty much drooling over that wardrobe! An absolute inspiration – check her out, I promise, you’ll love.

Now I have enough inspiration to get me through the whole weekend. <3

– Lise

Thrifting near and far

Yesterday Lise + Katina headed north to do a little thrift shopping. We woke up early, drove straight to Bellingham, and hit every shop we could on our way back down south. We thought we would share a few pictures from our trip:

Thrifting in Bellingham (1)

Thrifting in Bellingham (2)

Thrifting in Bellingham (3)

Thrifting in Bellingham (4)

Thrifting in Bellingham (5)

Thrifting in Bellingham (6)

Thrifting in Bellingham (7)

Thrifting in Bellingham (8)

Thrifting in Bellingham (9)

Thrifting in Bellingham (10)

Thrifting in Bellingham (11)

Thrifting in Bellingham (12)

Thrifting in Bellingham (13)

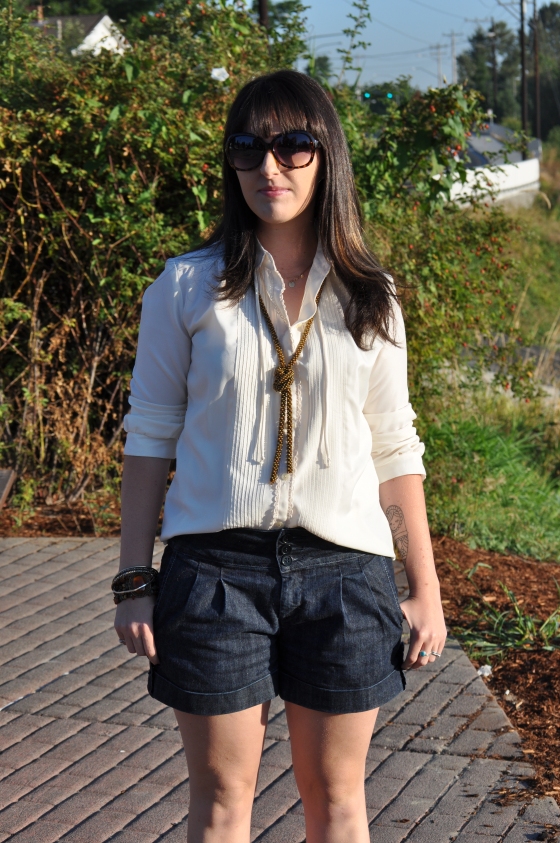
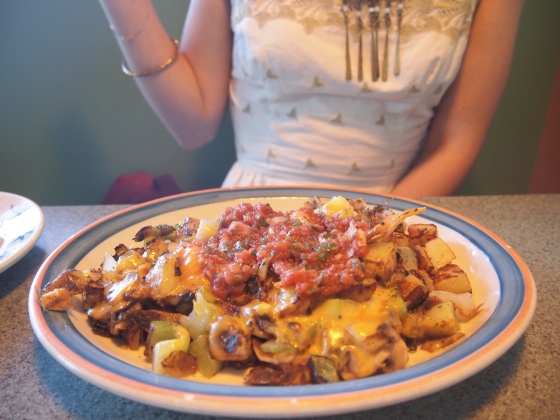
1. When you get up early you get to see the gorgeous fog! | 2./3. Katina rocking a vintage 1970’s ivory blouse with modern shorts | 4./5. Lise pairs a 1950’s Adele Martin dress with a gold 1970’s ring choker and boots | 6. La-la-la-lattes! | 7. Old Town Cafe in downtown Bellingham is our new love | 8./9. Noms give energy for all day shopping | 10. We don’t know what this is, but we <3 him. | 11. A mid-century sweater with great shape to the knit – you’ll be seeing this in our shop soon (minus the duckface)! | 12. Katina has to keep this perfect 1940’s swing jacket for herself! | 13. We love summer afternoons after full days of thrifting!

Keep an eye on our store for vintage goodies – we’re posting without a theme this week, so we won’t be announcing our listings.

– Lise + Katina